
E-mail with Microsoft Outlook

2nd October 2018

Learn how to configure Microsoft Outlook 2010 for use with your Heath Computers e-mail account using the POP3 Protocol.

Before you begin, you will need to have Outlook 2010 already installed on your computer and Create an E-mail Account in Your Heath Computers Package.

Step 1
On your computer, click Start > Control Panel.
 
Step 2

Type Mail into the search box at the top-right of the Control Panel window to quickly find the Mail icon. Then, double-click it.
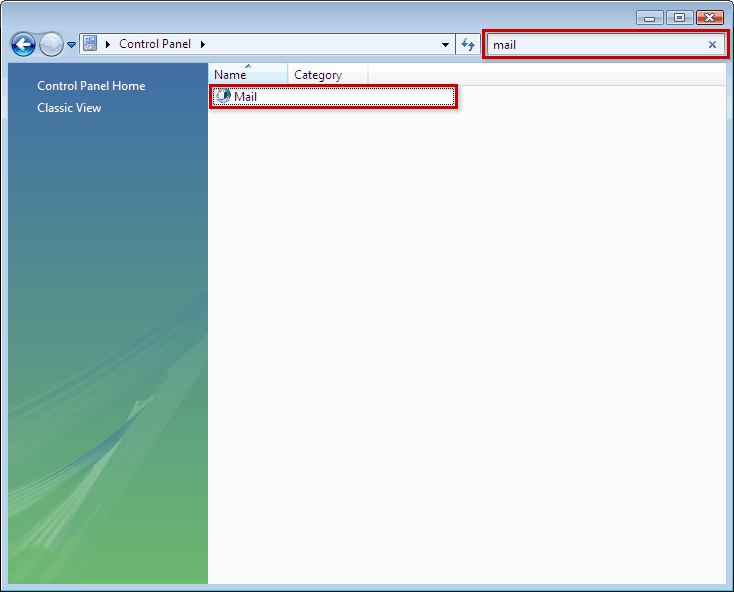
Search for Mail and double-click the icon
 
Step 3
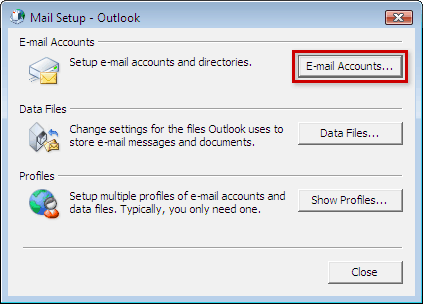
Click the E-mail Accounts button.
 

Click E-mail Accounts
 
Step 4
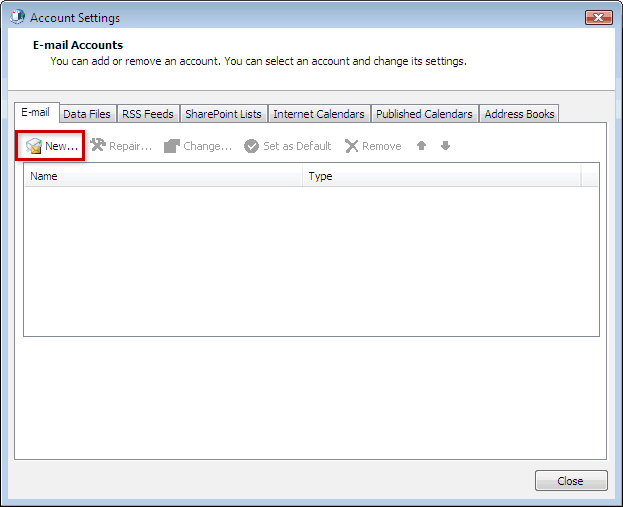
Under the E-mail tab, click the New button to add your e-mail account.
 

Select E-mail > New
 
Step 5
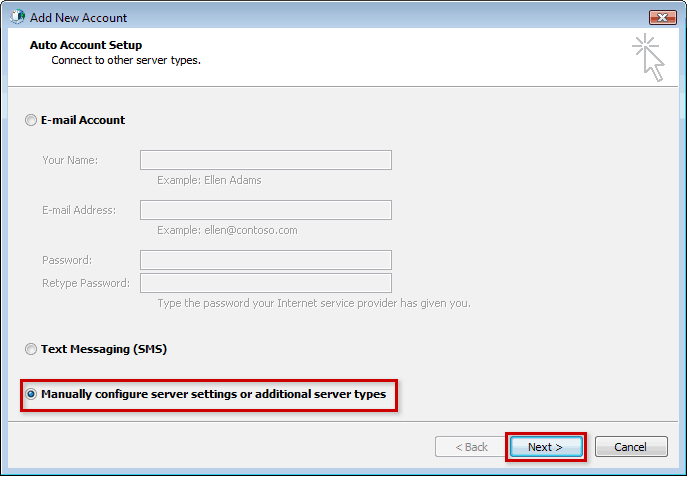
Select Manually configure server settings or additional server types and then click the Next button.
 

Select Manually configure and click Next
 
Step 6
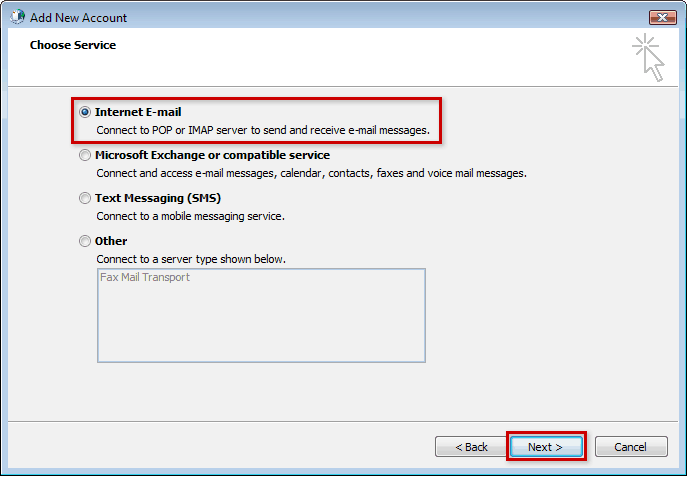
Select the Internet E-mail type of account and then click the Next button.
 

Select Internet E-mail and click Next
 
Step 7
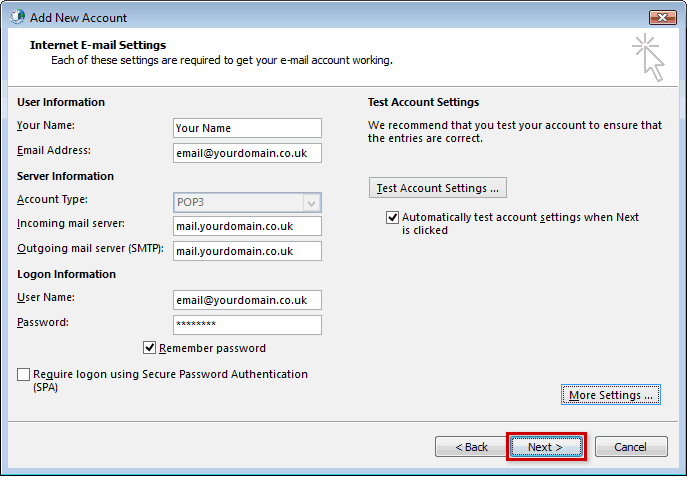
Enter the required information:
 
FieldData
Your NameThis is the name that will appear when others receive your e-mail
E-mail AddressYour E-mail address
Account TypePOP3
Incoming mail servermail.<yourdomain.co.uk>
Outgoing mail server (SMTP)mail.<yourdomain.co.uk>
User NameYour full E-mail address
PasswordThe password for your E-mail address

Then click the More Settings button to continue.
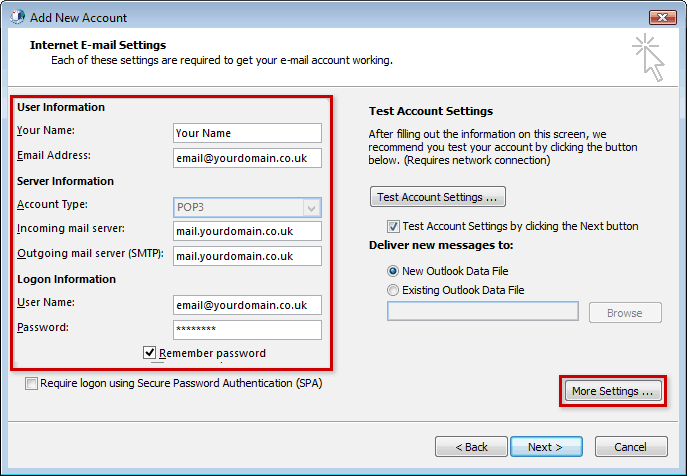
Enter the appropriate information and click More Settings
 
Step 8
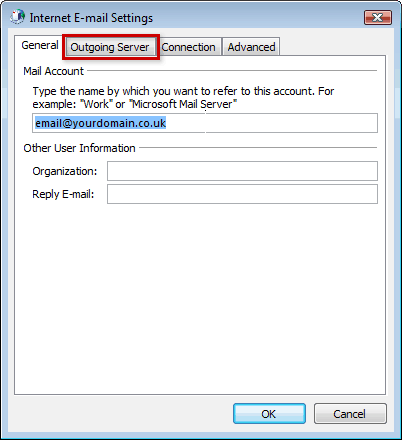
Select the Outgoing Server tab from the top of the new window that opens.
 

Select Outgoing Server
 
Step 9

Check the box for My outgoing server (SMTP) requires authentication and ensure that Use same settings as my incoming mail server is selected.

Next, click the Advanced tab at the top of the window.
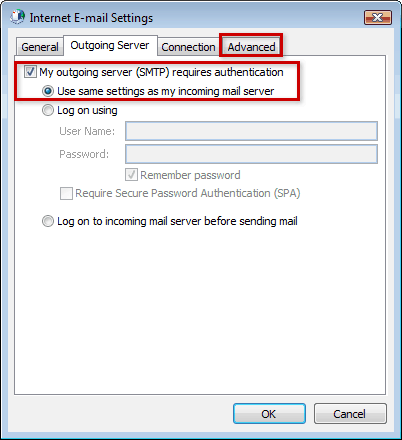
Check the boxes and click Advanced
 
Step 10

Enter port 110 as the Incoming server (POP3) port and ensure that there is NOT a tick in This server requires an encrypted connection (SSL).

Enter port 587 as the Outgoing server (SMTP) port and ensure that NONE is chosen from the drop-down box next to Use the following type of encrypted connection.

Click the OK button to save your settings.
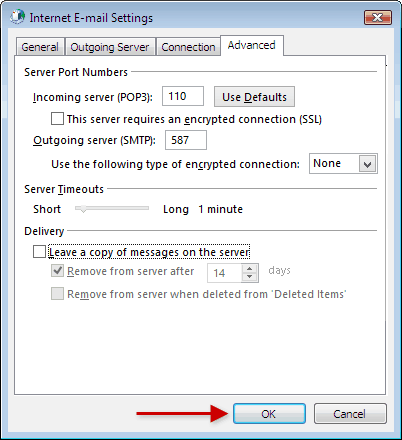
Enter the information and click OK
 
Step 11
Click the Next button.
 

Click Next
Step 12
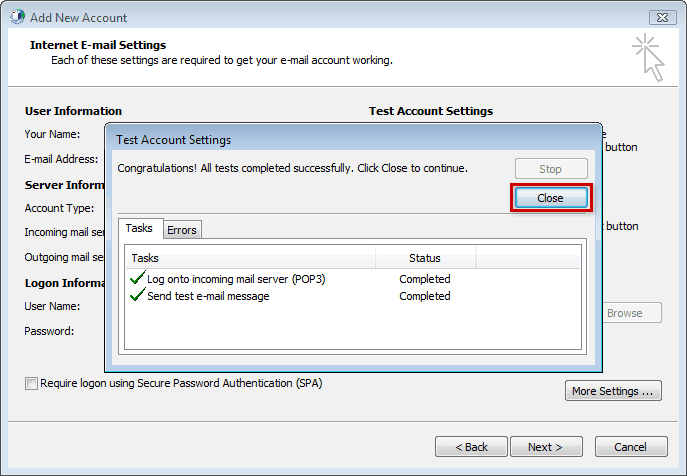
If the part of the test fails, go through the previous steps and double-check all of your settings in Outlook. If the test is successful, click the Close button.
 

Click Close
Step 13
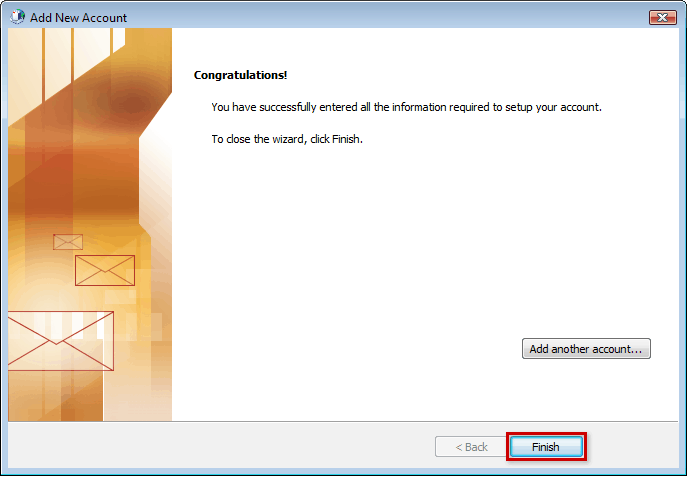
Click the Finish button.
 

Click Finish
 
Step 14
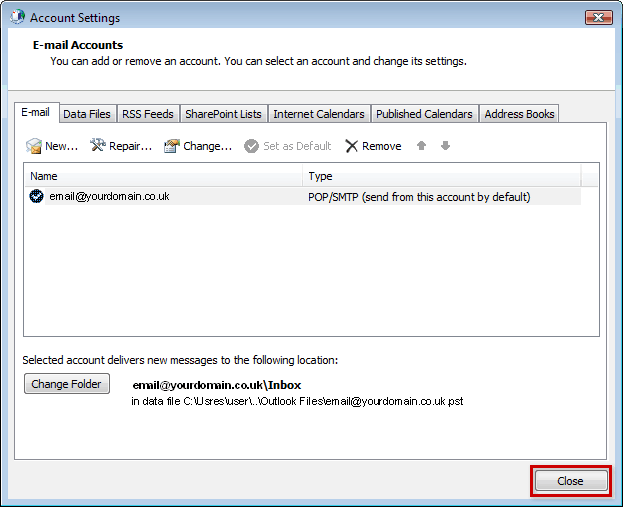
Click the Close button to close the Account Settings window.
 

Click Close
 
Step 15
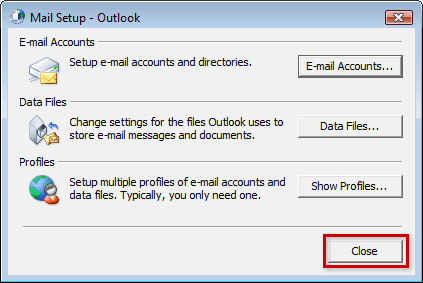
Click the Close button to close the Mail Setup window.
 

Click Close
 
Step 16
You may now launch Outlook from the Start menu and begin writing and checking your mail!